
Adding content to RikiTraki (Part 2)
Uploading a new track
In my previous post, I showed how to register to RikiTraki in order to enable track editing functionality. Now you are ready to upload and edit tracks.
To post a new track, click on the “Upload track” icon  on the left side of the menu bar to trigger the “Track upload” dialog:
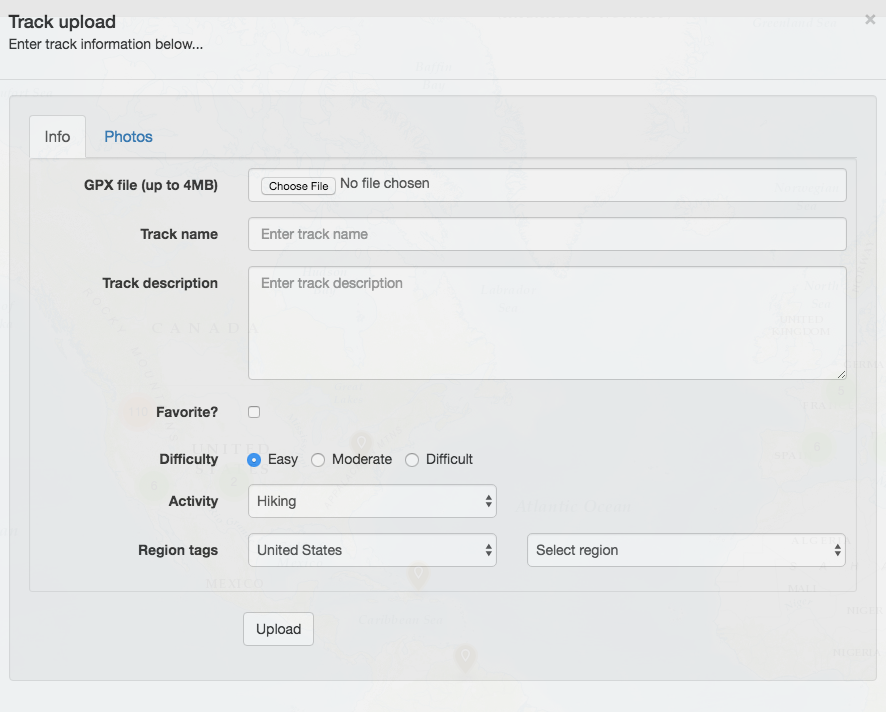
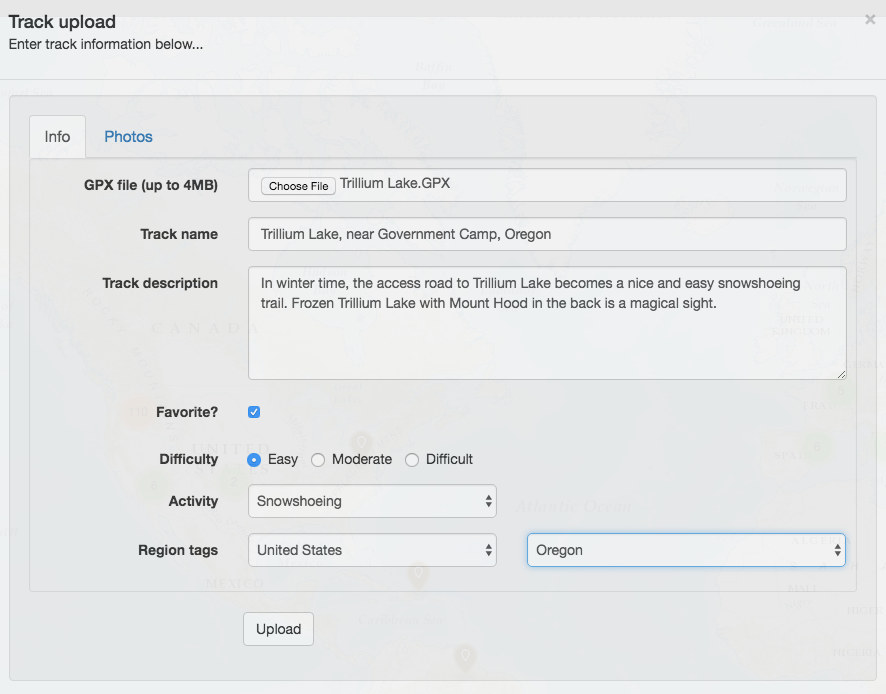
Pick a GPX file to upload (limited to 4MB in size) by clicking on “Choose file” and complete the remaining items on the form, like the example below:
If you have pictures to upload, click on the Photos tab:
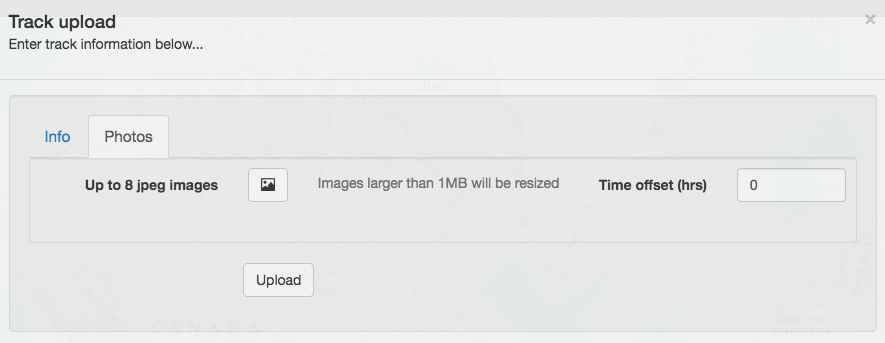
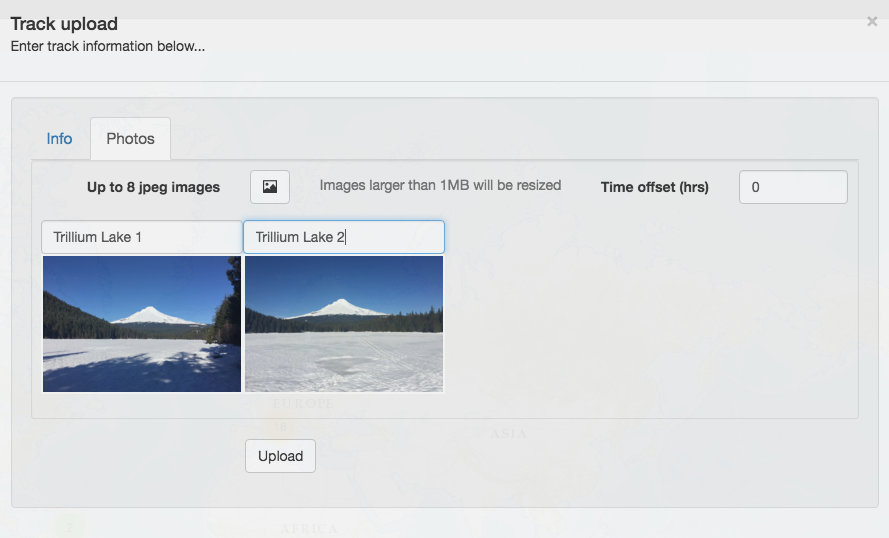
You can pick up to 8 jpeg image files to upload by clicking on the upload button  . Enter a caption for every image (defaults to the file name). You can change the order of the images by simply dragging an image to a new position. Please note that files larger than 1MB in size will be automatically reduced before uploading.
If the images contain location information, they will be automatically placed on their corresponding positions on the track. If you took your pictures with a smart phone, chances are that they already contain location information. Otherwise, RikiTraki will attempt to use the camera time stamp in order to figure out the location of the photo. But, what if the camera clock is out of whack? Well, you can use the “Time offset” feature to move the time forward (+) or backwards (-).
Click on the “Upload” button, and after a few seconds you will be able to see your track and pictures on the map:
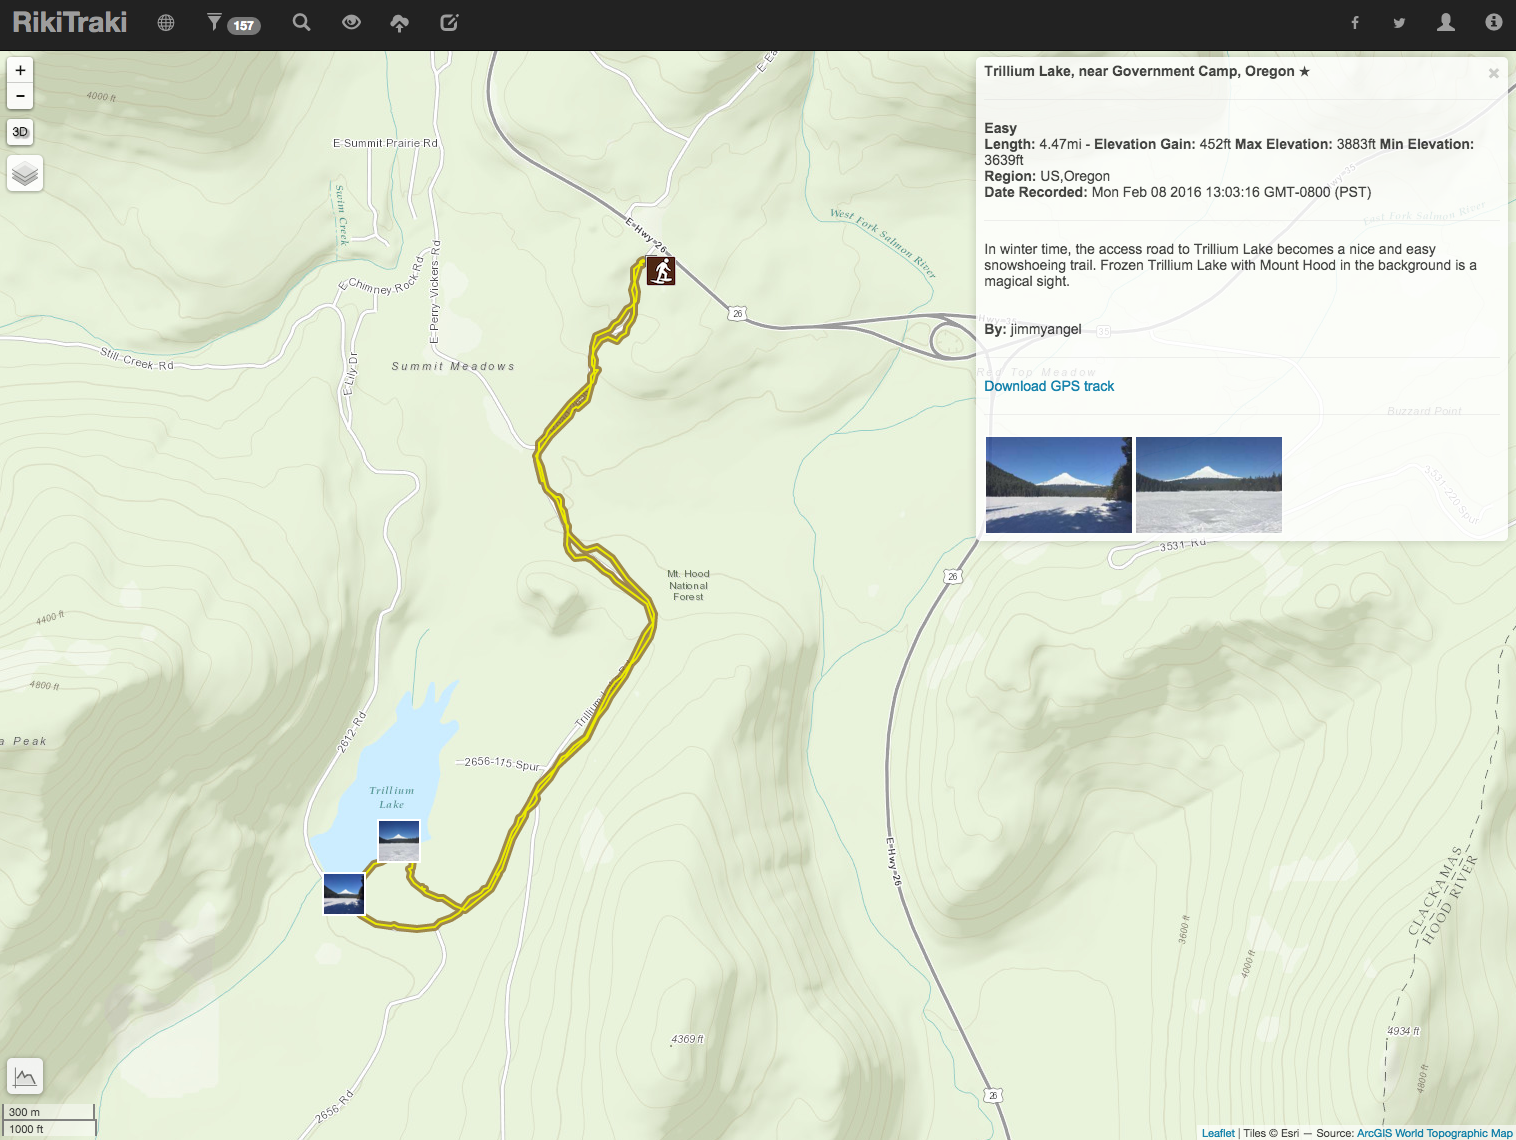
You can share the track on facebook or twitter  , or simply copy and paste the track url.
Editing a track
If you made a mistake or simply want to update the information on a track that you have uploaded, click on the “Edit track info”  button from the track view.
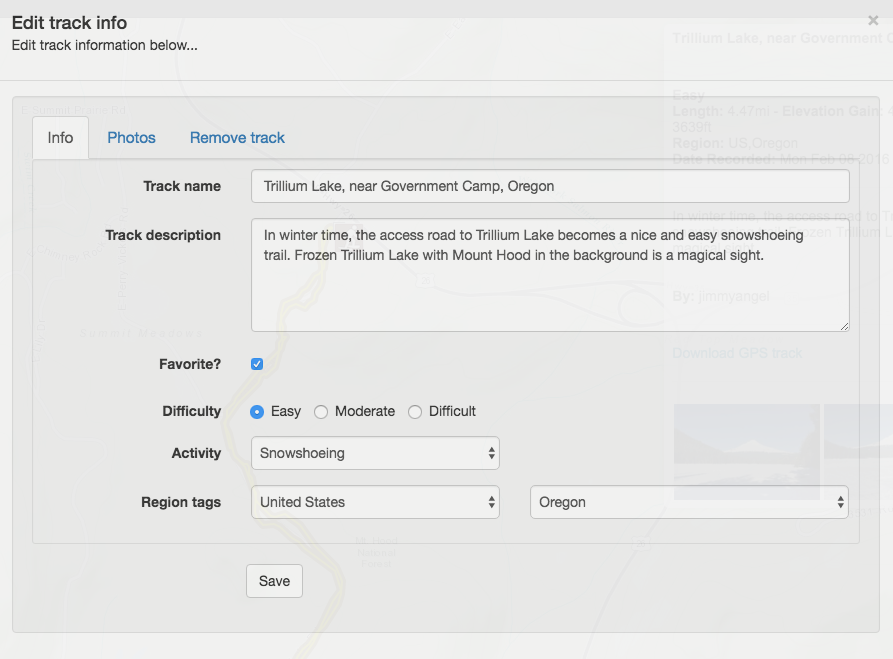
You can edit the track information, add photos, remove photos by dragging to the trash can icon, or reorder photos by dragging to new positions. You can also completely remove a track and associated pictures from RikiTraki.
This concludes my blog series on how to use RikiTraki. I hope you enjoy it. Please feel free to send me your comments or feedback.
In upcoming posts, I will be walking through the details of how I built this application.