
RikiTraki for Track Contributors
A guide to registering, uploading, geotagging, and editing your adventures
In my previous post, I walked through how to explore tracks on the new RikiTraki. This post flips the perspective. It is for track contributors. If you want to upload your own hikes, bike rides, runs, or adventures, this guide walks you through everything you need to know.
Registering your account
Before you can upload tracks, you need a RikiTraki account. Registration is quick and only required once.
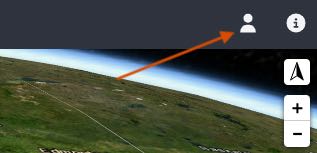
Open the login and registration dialog
Click the user icon in the top right corner.
Register
Switch to the Register tab and fill out the form. RikiTraki asks for your email address so it can activate your account and help you recover your password if needed.
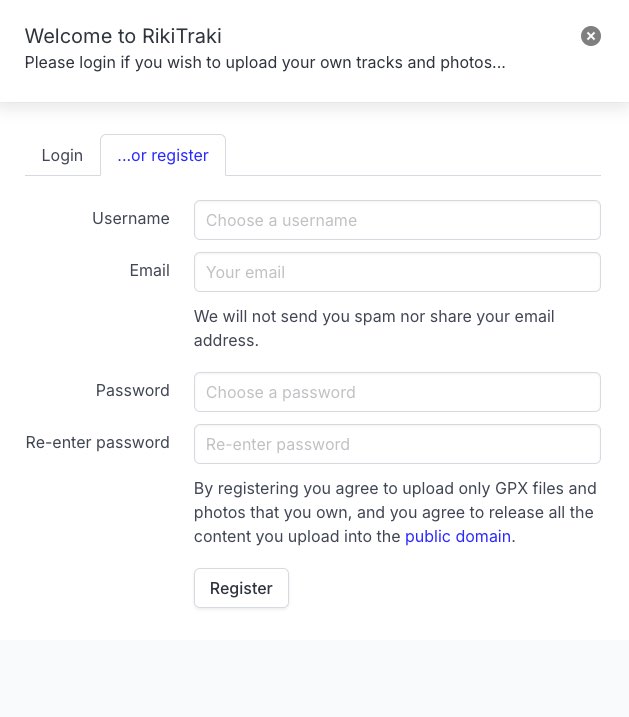
It is a good idea to choose a username that is friendly for URLs, for example one without spaces. Short names like juan-c-jover or mountainrunner work well.
Your username becomes part of your personal RikiTraki space, which you can read more about in the section below.
A note about content ownership
When you register, you agree to upload only GPX files and photos that you personally own. You also agree to release all uploaded content into the public domain. This keeps RikiTraki simple, open, and shareable. Every track and photo becomes part of a public resource that anyone can explore.
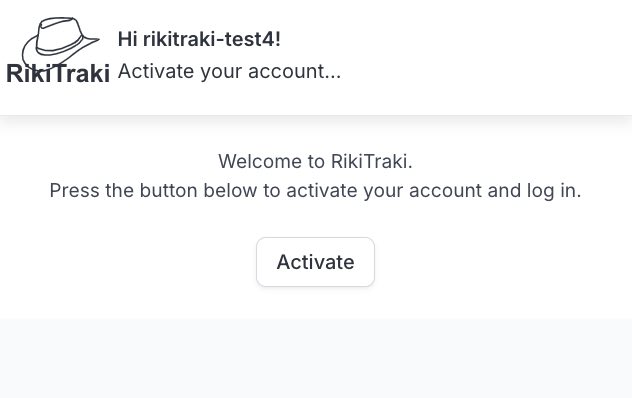
Activate your account
RikiTraki will send you an activation email from noreply@rikitraki.com with the subject line “RikiTraki account activation”.
Open it, click the link, then click the Activate button. Your account becomes active immediately and you are automatically logged in.
Login, forgot password, reset password
Once activated, you can log in anytime.
If you forget your password, use the Forgot password section at the bottom of the dialog. RikiTraki will send you a reset email. If you lose your activation email, you can also use the Forgot password method to activate your account. You will just need to choose a new password.
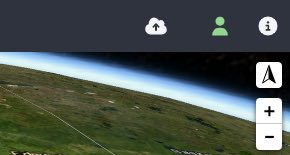
After logging in, you will notice two changes in the top menu. The Upload Track icon becomes available, and the user icon lights up in a soft green color to show that you are logged in.
Uploading a track
Uploading a track has two parts.
- GPX and information about the track
- Photos (optional but recommended)
Open the upload modal
Click the Upload Track icon.
Pick a GPX file
Choose a GPX file up to 4MB.
Fill in the track information
Give your track a name, description, favorite tag, difficulty level, and activity type.
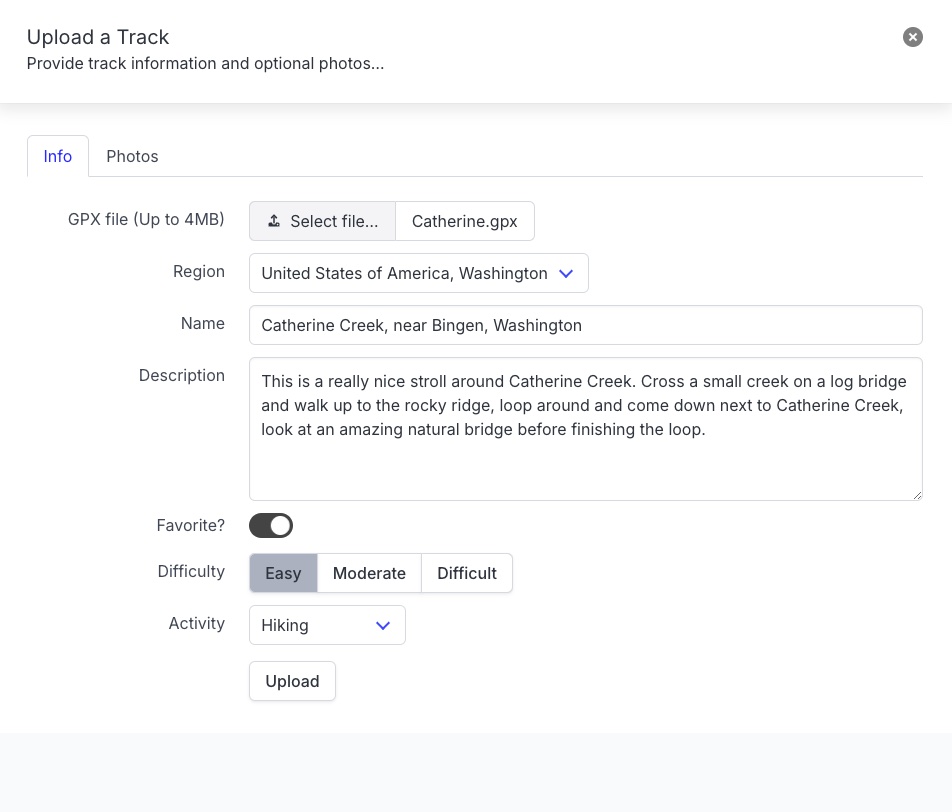
The region field is assigned automatically based on the track’s starting point. If the trailhead region is ambiguous because it is too close to a boundary, you can pick the most appropriate region.
A quick note about track names and descriptions
Please give your track a clear and meaningful name (a minimum of 20 characters). Something like “Forest Park Loop, Portland” or “Mount Hood South Side” helps others understand what they are looking at. Avoid placeholder names like “test” or random text. RikiTraki is a shared public map, and thoughtful titles and descriptions make it more useful for everyone.
Adding photos
Switch to the Photos tab to upload images.
Photos are encouraged. Tracks with photos appear in the “What’s new…” panel on the homepage, which helps others discover your content more easily.
Upload up to 8 JPEGs
Use the upload button to add photos. RikiTraki generates thumbnails and lets you reorder photos by dragging. You can also delete unwanted photos.
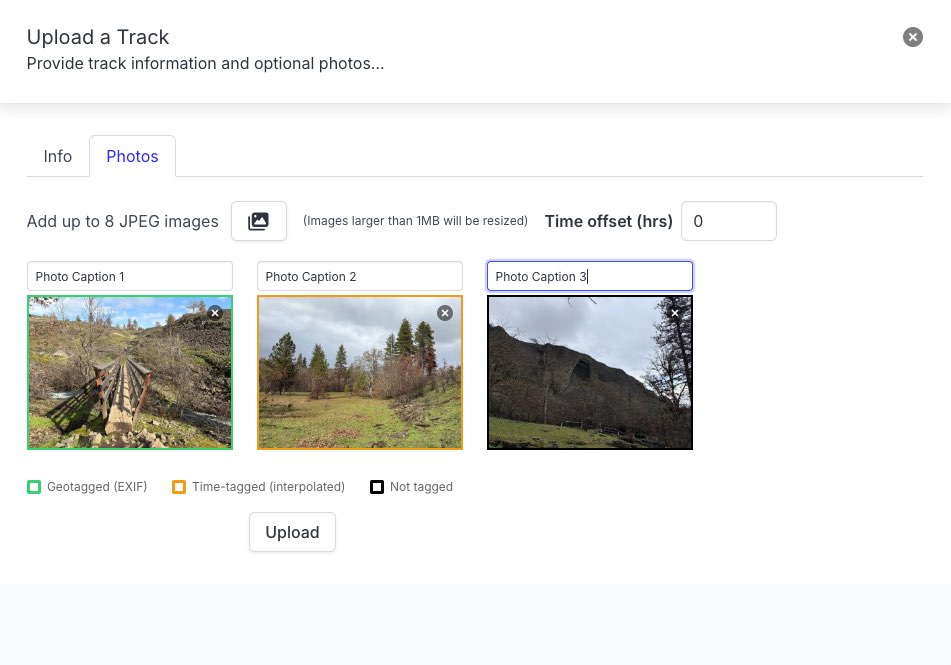
Automatic geotagging
If your photos contain location information, RikiTraki places them automatically along the track. These photos have a green border.
Timestamp based placement
If a photo has no location information, RikiTraki uses its timestamp to estimate where it belongs on the track. If the timestamp falls within the track’s time range, the photo will have an orange border.
Time offset
If your camera clock was off, adjust the time offset until the photos line up correctly.
Since photo timestamps usually do not include timezone information, you may need to adjust the offset if the track was recorded in a different timezone than where you are uploading from.
Photos that cannot be tagged, either because they have no timestamp or fall outside the track time range, will have a black border.
Editing an existing track
Once a track is uploaded, you can return to it and make changes at any time.
Open the edit modal
From the track view, click Edit track icon.
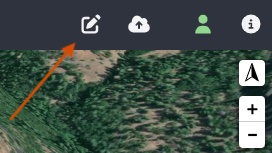
The dialog looks just like the Upload screen with an additional option to remove a track. Once you upload a GPX file, the only way to replace it is to remove the track and upload it again. I may add a GPX replacement feature in the future.
What you can edit
- Track name, description, favorite tag, difficulty level, and activity type
- Region tags (if ambiguous)
- Photos: add, remove, reorder, update captions
- Delete the entire track including photos
Edits are saved instantly, and the map updates as soon as the dialog closes.
Your personal RikiTraki space
A feature I have wanted to build for a long time is now part of RikiTraki. Every contributor has a personal space that shows only their tracks and their own “What’s New…” panel. It is a small home base you can share with friends, family, or followers.
rikitraki.com/your-username
For example, here is my own space: rikitraki.com/jimmyangel
Your personal space shows only your tracks. The “What’s New…” panel also filters to your own recent uploads. It is an easy way to share your adventures with friends, family, or followers without mixing them into the global map.
How others can find your space
Anyone can visit your personal space by clicking your username. This works in two places:
- In the track view, next to the track details
- In the list of tracks on the left panel
Clicking a username always takes you to that user’s personal space.
Switching between global and personal views
When you are logged in, you can switch between the global map and your own personal space from the User Info dialog. This makes it easy to explore everyone’s tracks or focus on your own.
Wrapping up
This is the full contributor workflow in RikiTraki 2.0. From registration to uploading, geotagging, and editing. The goal is to make sharing your adventures as simple and enjoyable as possible.
If you have ideas, run into quirks, or want to help shape future features, I would love to hear from you. RikiTraki has always grown through real world use and feedback.